Fall is right around the corner.
I know it is because my calendar told me so.
Too bad that someone forgot to tell the weather.
Cross Country was cancelled for my oldest today because the heat index is at 109!
1.0.9.
That isn’t even close to fall…
But I will just keep pretending and setting out pumpkins and decorating wreaths and displaying gourds in cute little DIY cloches and totally ignoring the fact that you melt as soon as you walk outside the door.
I’m good at pretending…as long as I have an air conditioner!
So for those of you who are ready to get ready for the fall that is sure to come.
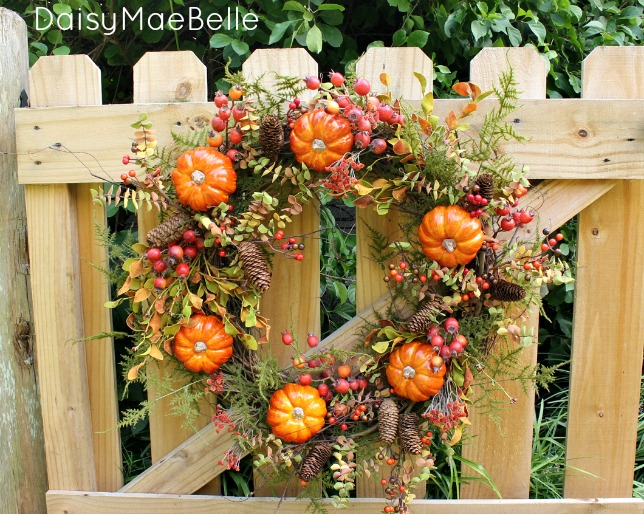
Here is how to make a fall wreath.
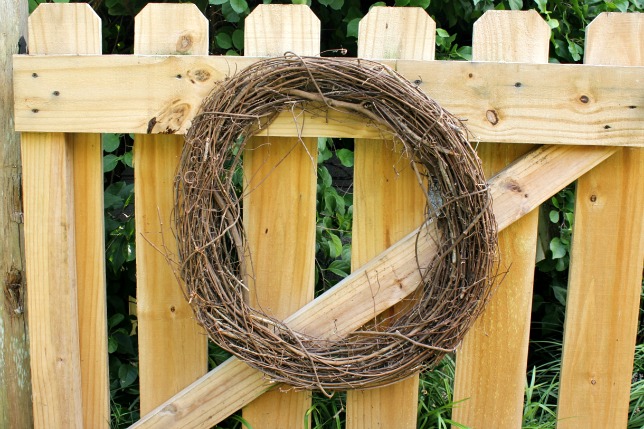
Start with one plain grapevine wreath.

Add single stems of greenery until you have covered the base.
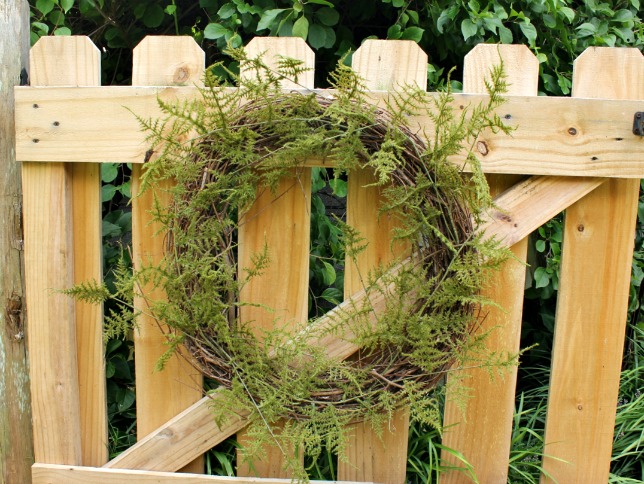
Overlap the stems with the leaves.
It took me 5 stems to cover this wreath.
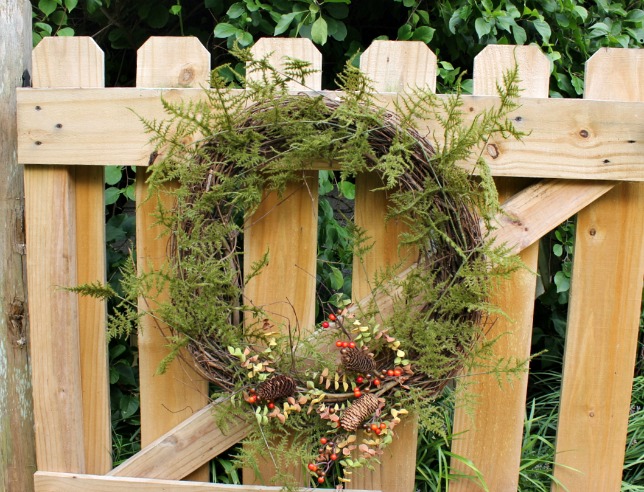
Next I added a stem that had several types of fall goodness.
Each stem had 3 pinecones, some berries and some foliage.
I added the first piece to the bottom of the wreath.

Then I added 2 more.
I didn’t want them placed too evenly apart, but I did want them to cover the majority of the wreath.
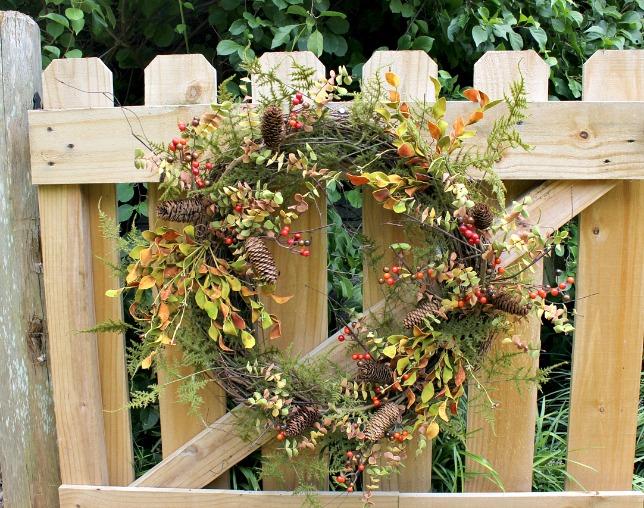
After the stems came clusters of foliage.
I filled in some of the spaces around the pinecone stems.
The foliage that I chose was very close in color and style to the foliage on the original stems.
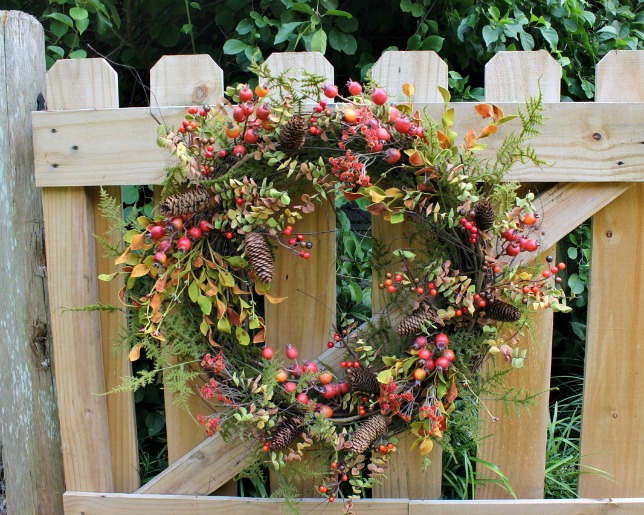
Next came clusters of giant berries.
I added 6 of those.
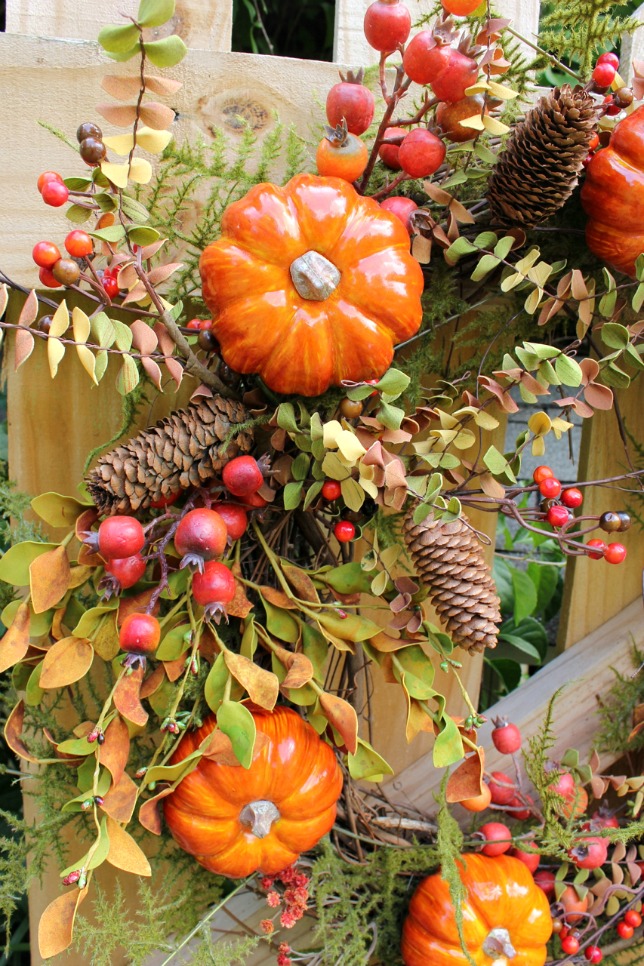
And the pumpkins really brought the whole thing to life.
And even though the weather is not cooperating.
And even though I know that it is entirely too early to hang a fall wreath on my front door because “what would the neighbors think?!”
I’m glad to know that the very second that fall does arrive…
…I’m ready with this wreath!
Life to the full!
Melissa
Follow Us!


Under the Table and Dreaming, The DIY Showoff, Mega Inspiration Monday, Inspire Me Monday, Monday Funday, Between Naps on the Porch, My Uncommon Slice of Suburbia, Savvy Southern Style, The Inspiration Exchange, From My Front Porch to Yours, Tatertots and Jello,
The post How to Make a Fall Wreath appeared first on daisymaebelle.


